Getting Started with BrainGrid CLI: From Idea to Shipped Feature
Set up BrainGrid CLI in 5 minutes and start turning vague ideas into AI-ready specs. Covers install, init, and the specify-build workflow.

In the next five minutes, you'll install BrainGrid CLI, connect it to Claude Code, and turn a rough idea into a structured requirement with acceptance criteria. No engineering background needed.
Vibe coding has changed the landscape - just a simple prompt, and you're building - even if you have no programming experience. If you're a dev, you'll find you're writing less code, but building faster.
The holdup: bad prompts. You end up in a rabbit hole, going back and forth with the AI trying to dig out. A poorly worded prompt or a misunderstood feature, and suddenly you're debugging instead of building.
BrainGrid's Product Planning AI takes your simple prompts into detailed engineering requirements and tasks - leading to better code, and fewer rabbit holes. When building from specifications, you'll build better products, faster.
In this post, we'll install the BrainGrid CLI and start building in just a few short minutes.
#What Is BrainGrid CLI?
CLI stands for Command Line Interface. The BrainGrid CLI connects the code on your computer with BrainGrid. Instead of prompting directly into your AI agent, prompt into BrainGrid first — it turns your prompt into a detailed specification. BrainGrid then feeds the tasks from that specification directly to your AI agent to build.
If it sounds like an extra step, it is. But the carpenter who measures twice cuts once - and ships a cabinet that actually fits. That extra minute upfront is what separates a feature that works the first time from a two-hour debugging session that goes nowhere.
#Installation
Full documentation is available from BrainGrid. But installation is a one liner:
1npm install -g @braingrid/cli
Note: This assumes you have NPM installed. If you don't, here's a guide with downloadable installers for Windows and Mac.
Now, we need to connect your local install to the BrainGrid servers. If you don't already have an account, you will need to visit BrainGrid.ai to create a free account. Then run this command to connect the two:
1braingrid login
A browser window will open, and you may be asked to sign in. Once complete, the CLI and BrainGrid are connected.
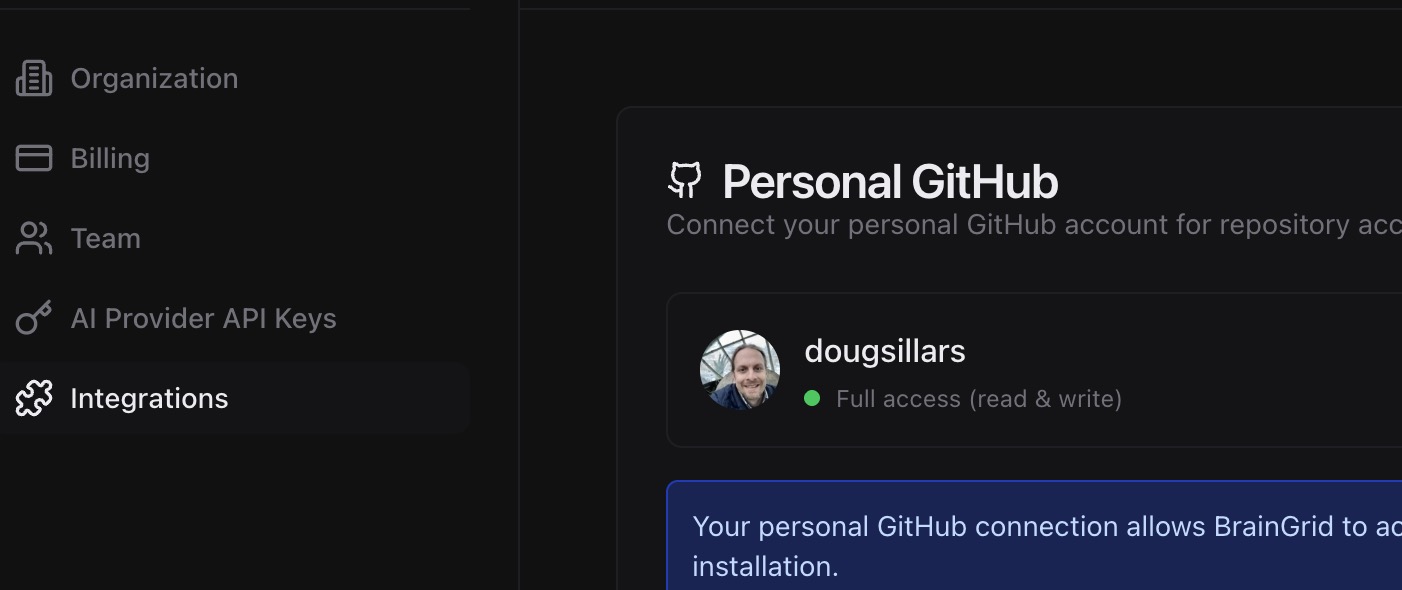
If you are using GitHub, connecting it to BrainGrid makes branch management automatic. In the BrainGrid dashboard:
- Under account: choose settings
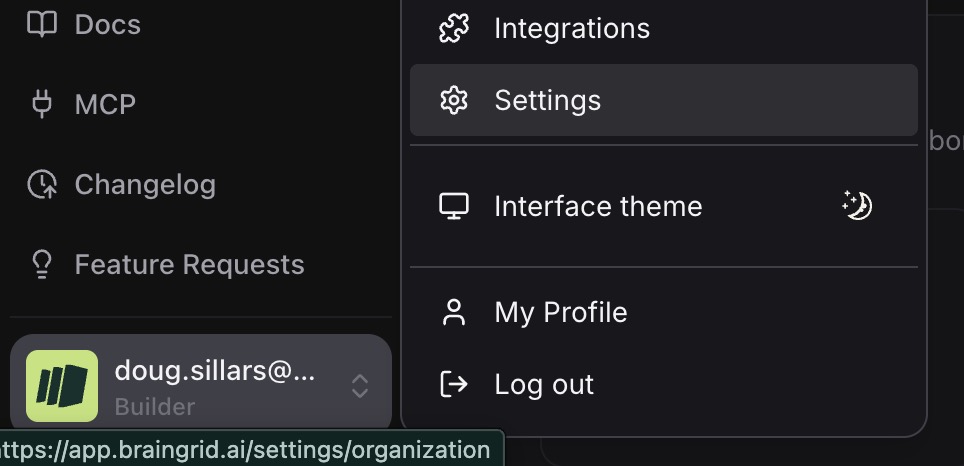
- In settings, pick Integrations, and connect to your GitHub account:
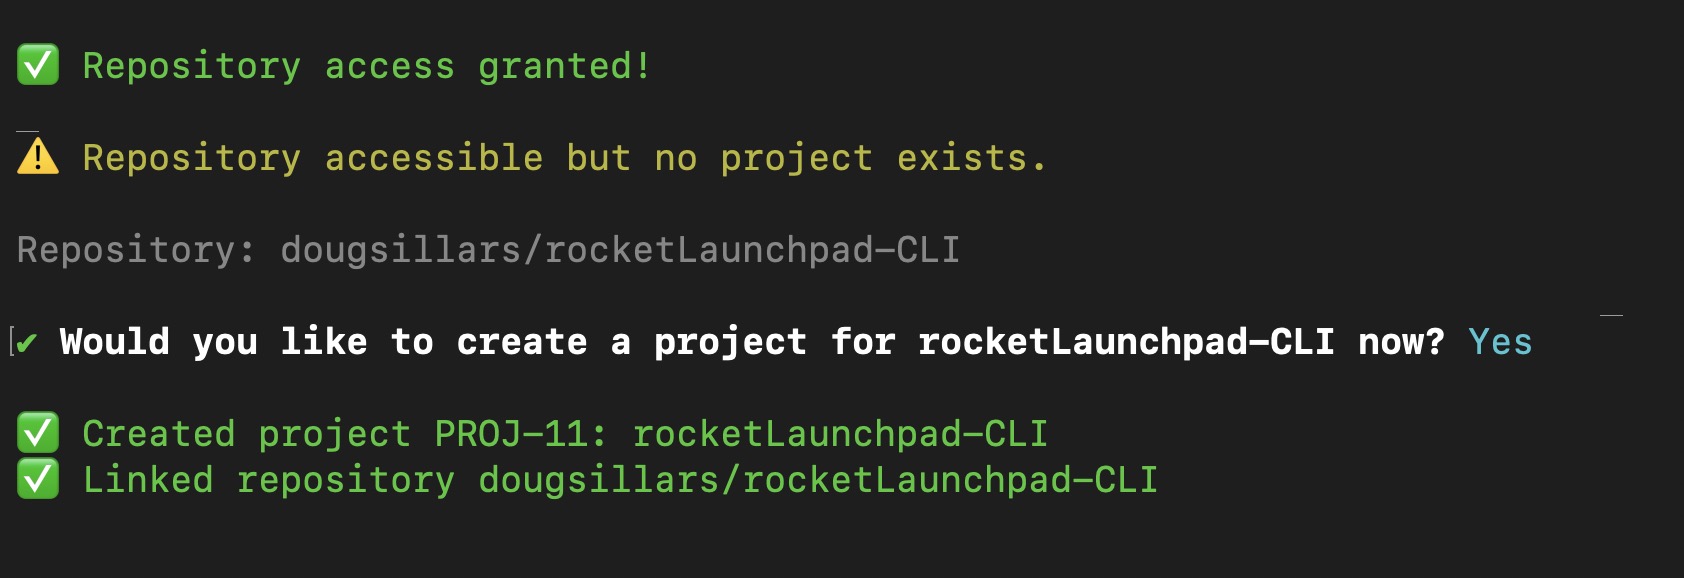
#Initializing a project
BrainGrid treats every codebase as a project. For each thing you build, you'll want a project. If you have an existing repo, you can initialize into the existing project to continue building. If you have a new project, you can initialize an empty project to start building.
1braingrid init
In this demo, we are going to build with Claude Code, so we'll want to add the Claude Code setup to BrainGrid:
1braingrid setup claude-code
This assumes you have Claude Code installed.
Now, BrainGrid is connected to the local repository, Claude, and GitHub. Setup complete, and now we are ready to build!
#Building with the BrainGrid CLI
If building with the CLI, all commands begin with braingrid. If you cannot remember a command, add --help to the end of your command, and BrainGrid will give you a list of all the options available.
For simplicity, we'll use the CLI commands inside Claude Code - there are just two commands to remember:
/specify/build
We use the specify to create the specifications and requirements from your prompts. We'll then use build to take the requirements, break them into tasks, and build the features in the tasks.
That's all there is to it. Let's see it in action.
#Specify
This is where you enter your prompt. Instead of giving it to Claude to start building, you are passing it to BrainGrid to turn your prompt into a detailed specification.
Here's an example - I'll use a prompt to build a Rocket Launch Dashboard:

After a few minutes, BrainGrid has come up with the requirement to execute my prompt:
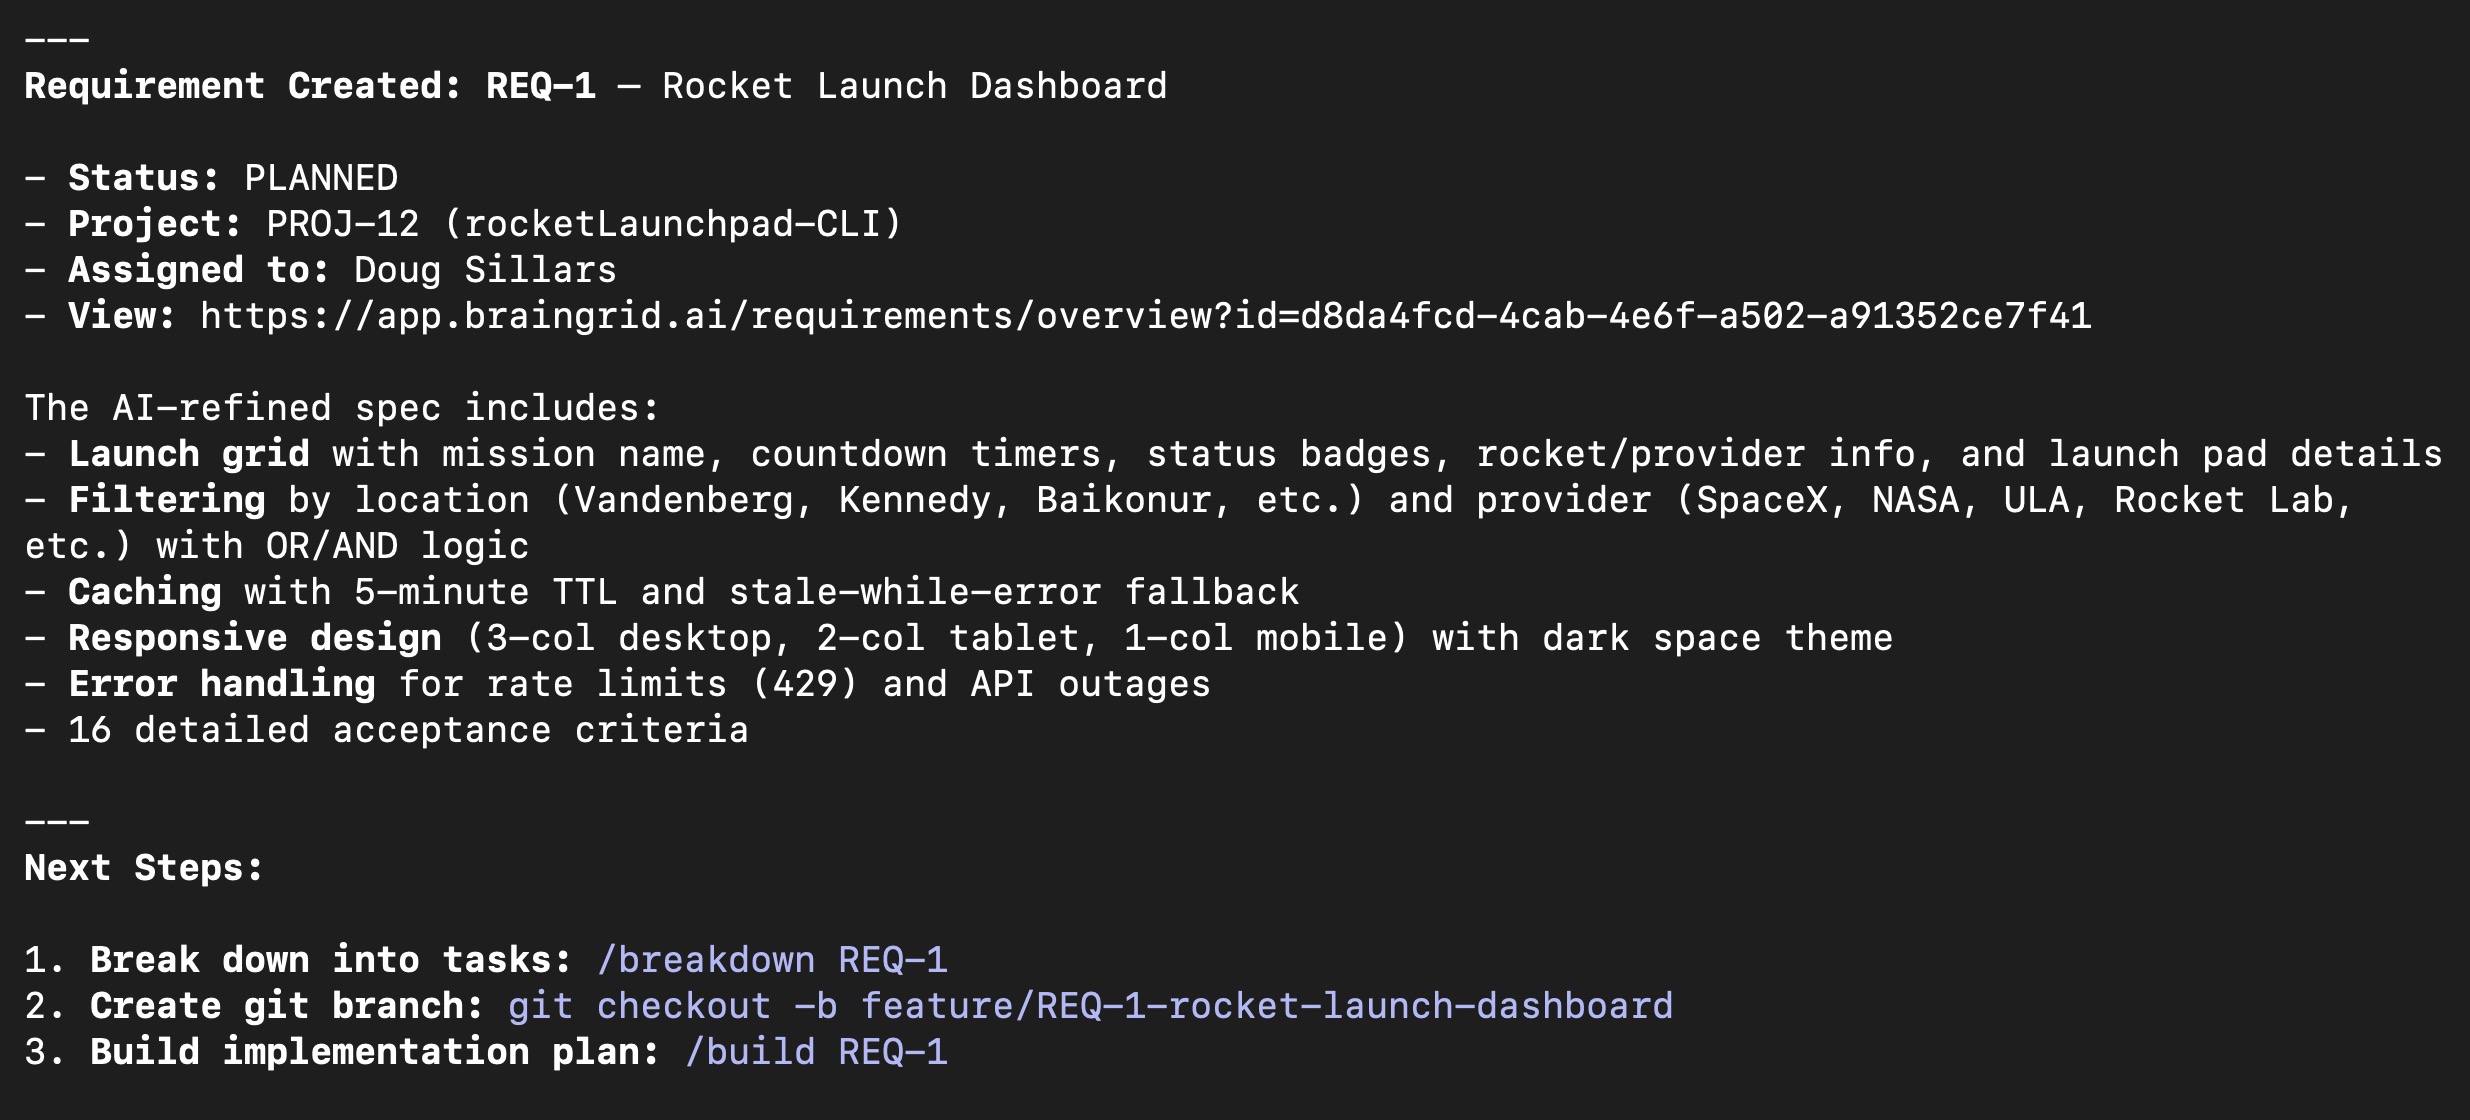
We can also find the requirement on the BrainGrid dashboard:
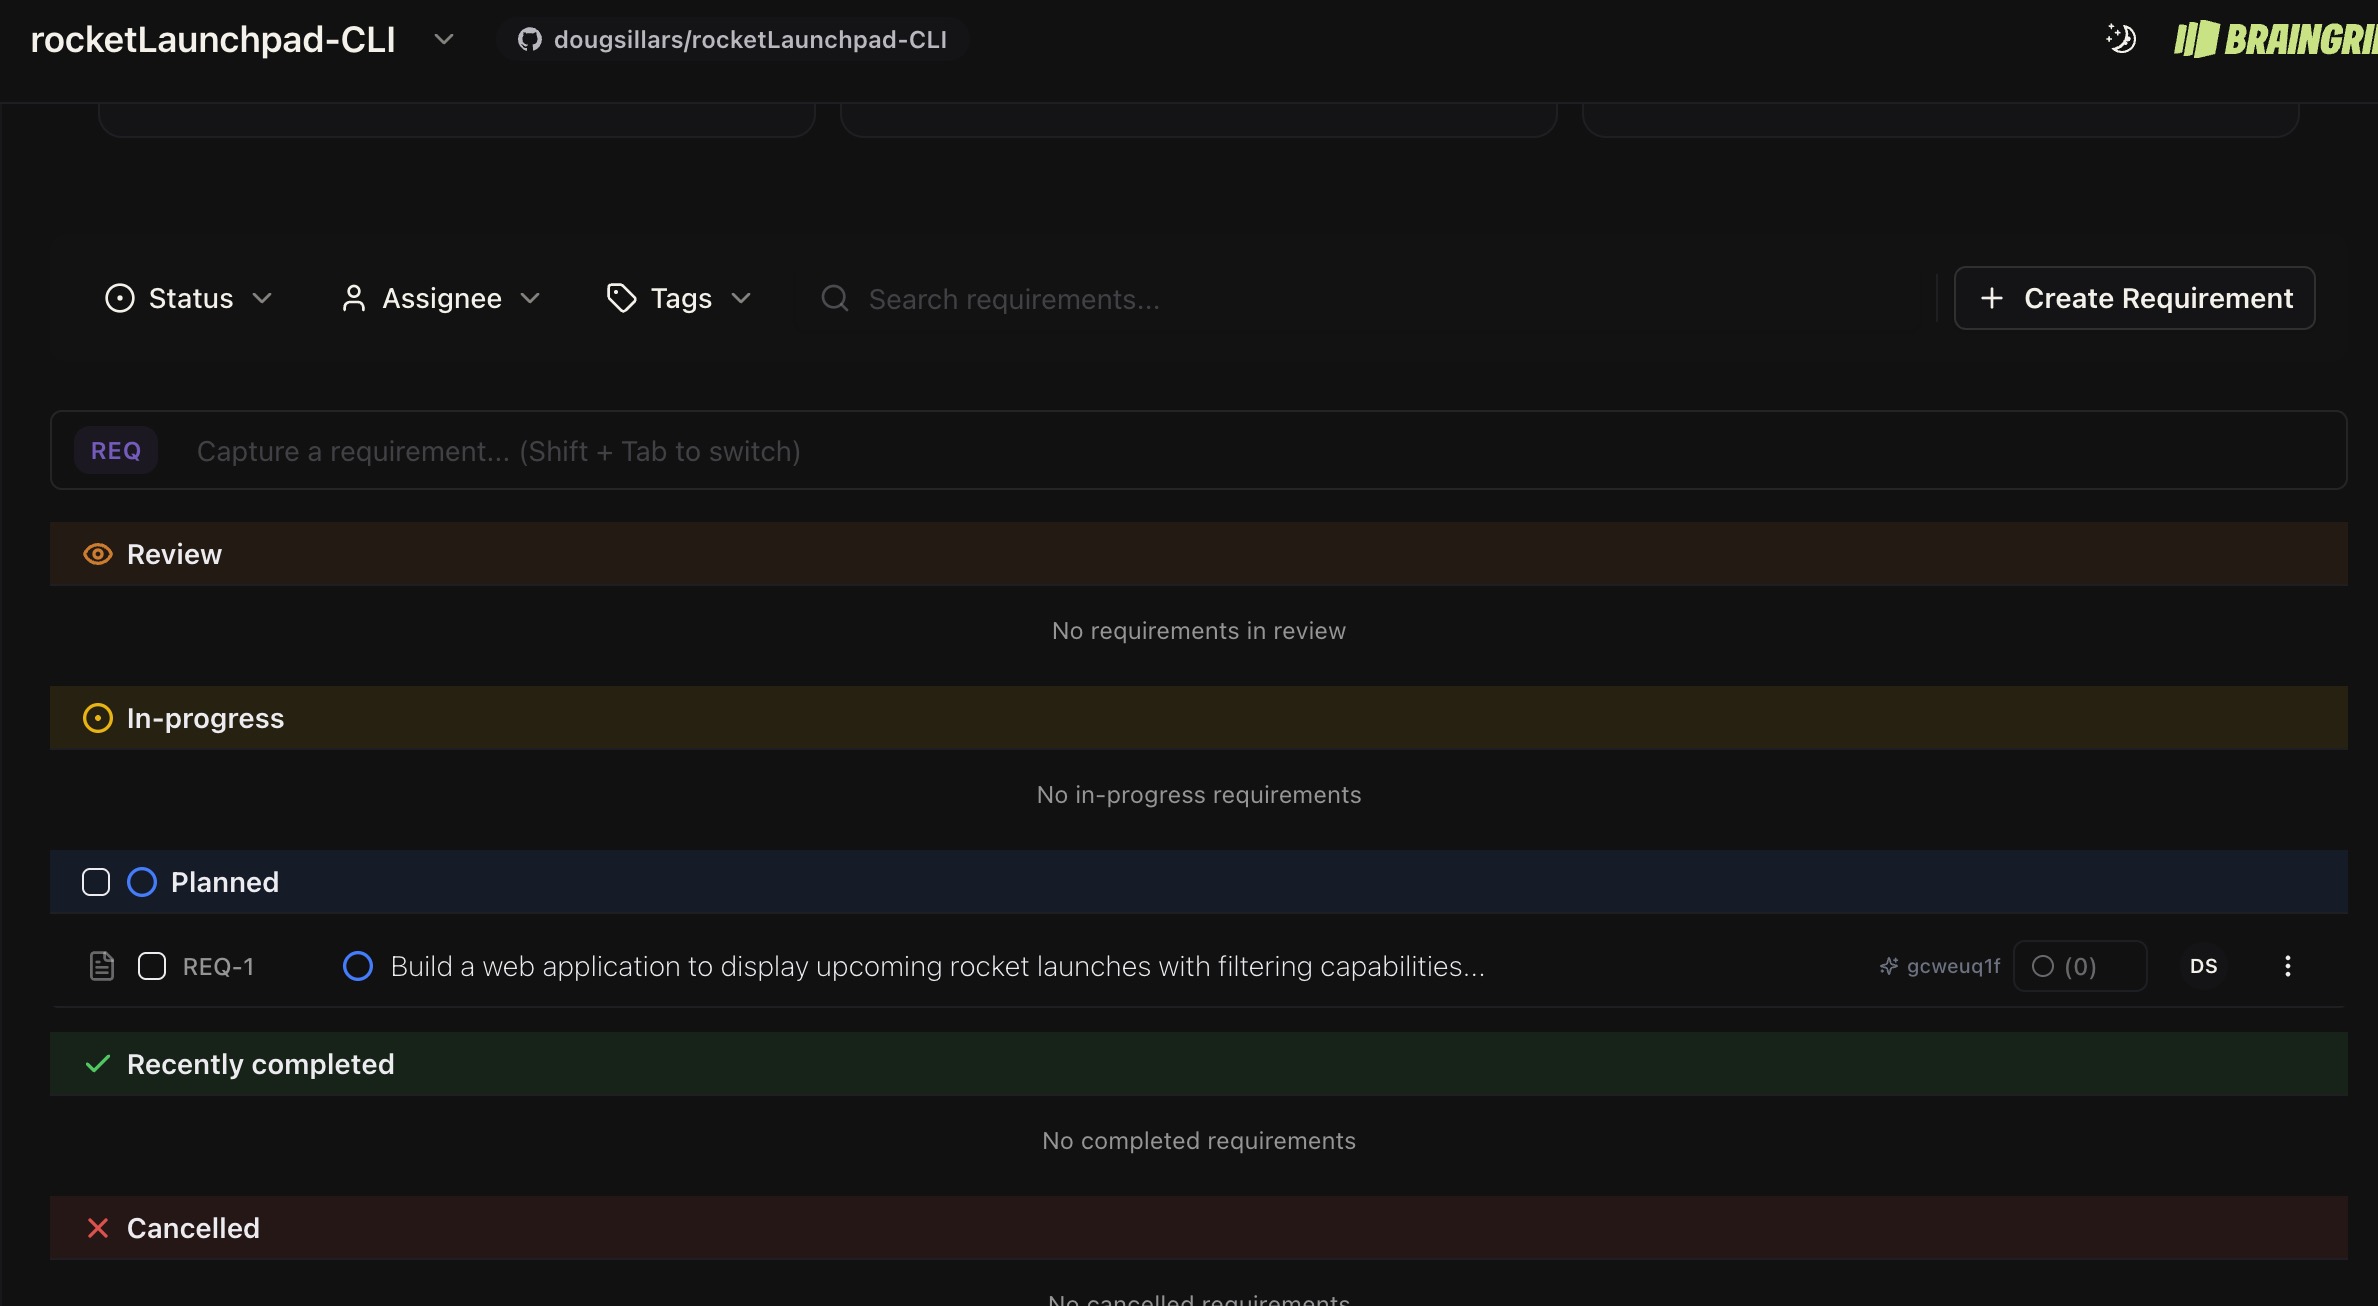
The dashboard shows the complete requirement document, which you can refine in BrainGrid or with Claude. There are 10 sections to the requirements document:
- Overview
- Problem Statement
- Solution
- UI/UX Layout
- Jobs to be done
- User Stories
- Functional Requirements
- Technical Requirements
- Out of Scope
- Acceptance Criteria
BrainGrid has acted as our AI Product Planner, taking a simple one sentence prompt into a detailed document. With this sort of detail and insight, developers (whether human or AI) will have an easier time building - there is a real specification! To see how this fits into the full Idea → Epic → Requirements → Build workflow, check out our methodology post.
So, let's give this requirement to BrainGrid to create the detailed tasks, and then have Claude complete them.
#Build
One command handles everything from here. Run /build and BrainGrid breaks the requirement into tasks, creates a Git branch, and Claude works through each task in sequence.
1/build req-1
After a few minutes, BrainGrid has created 6 tasks, and passed those 6 tasks over to Claude to build them. I went and made a sandwich.
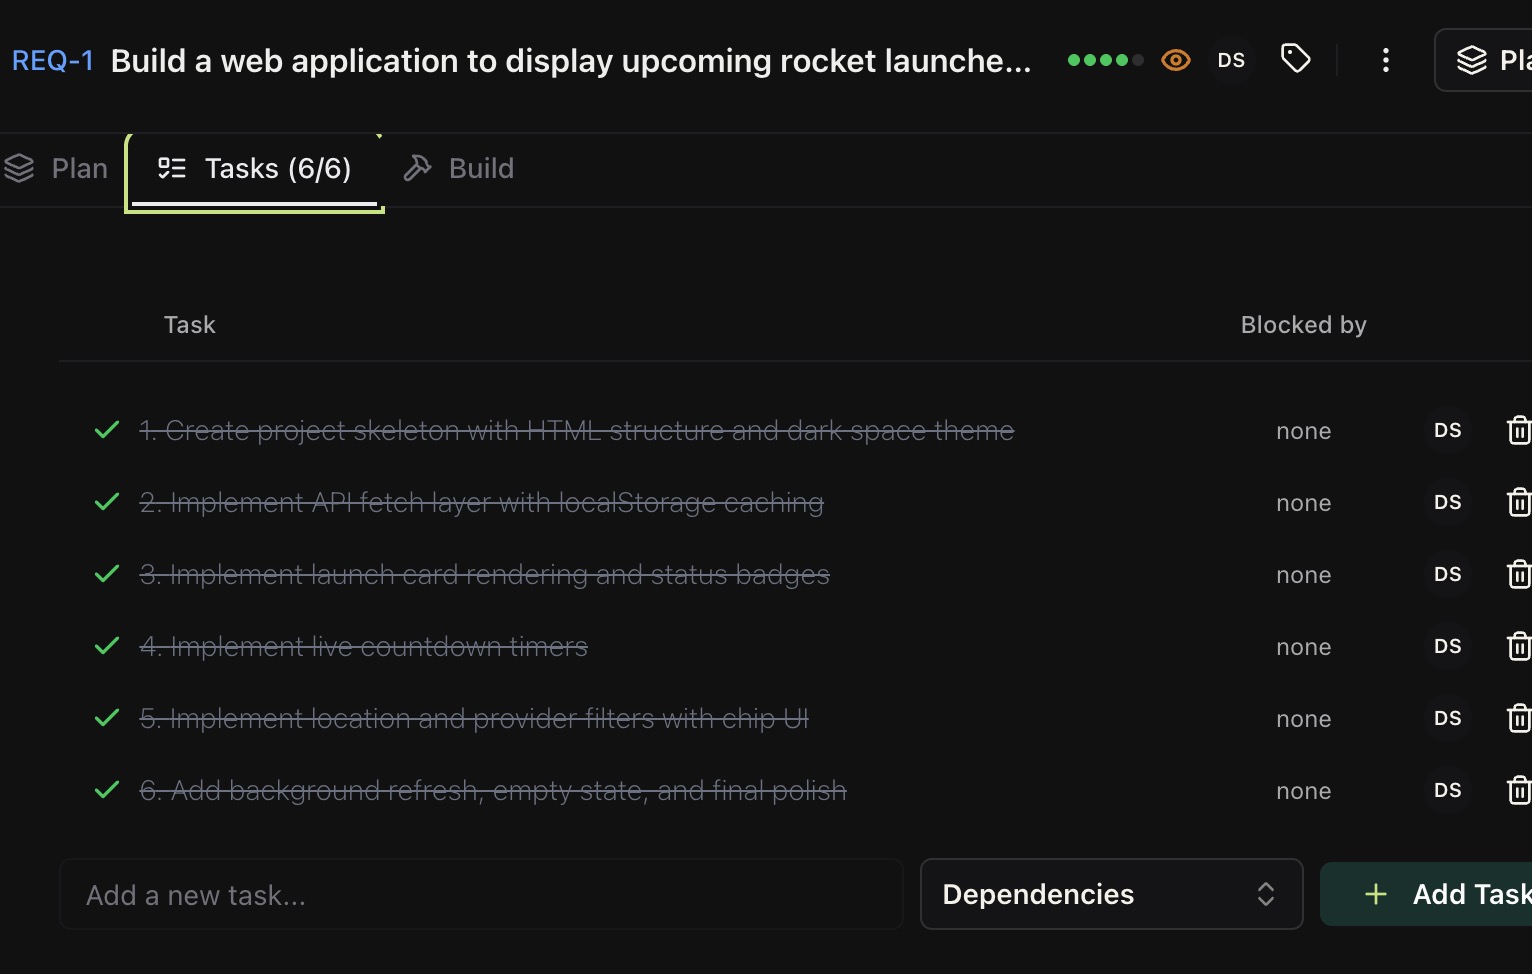
When I returned, I could see 6 tasks in the BrainGrid UI, and all 6 were completed.
Looking in the Claude output:
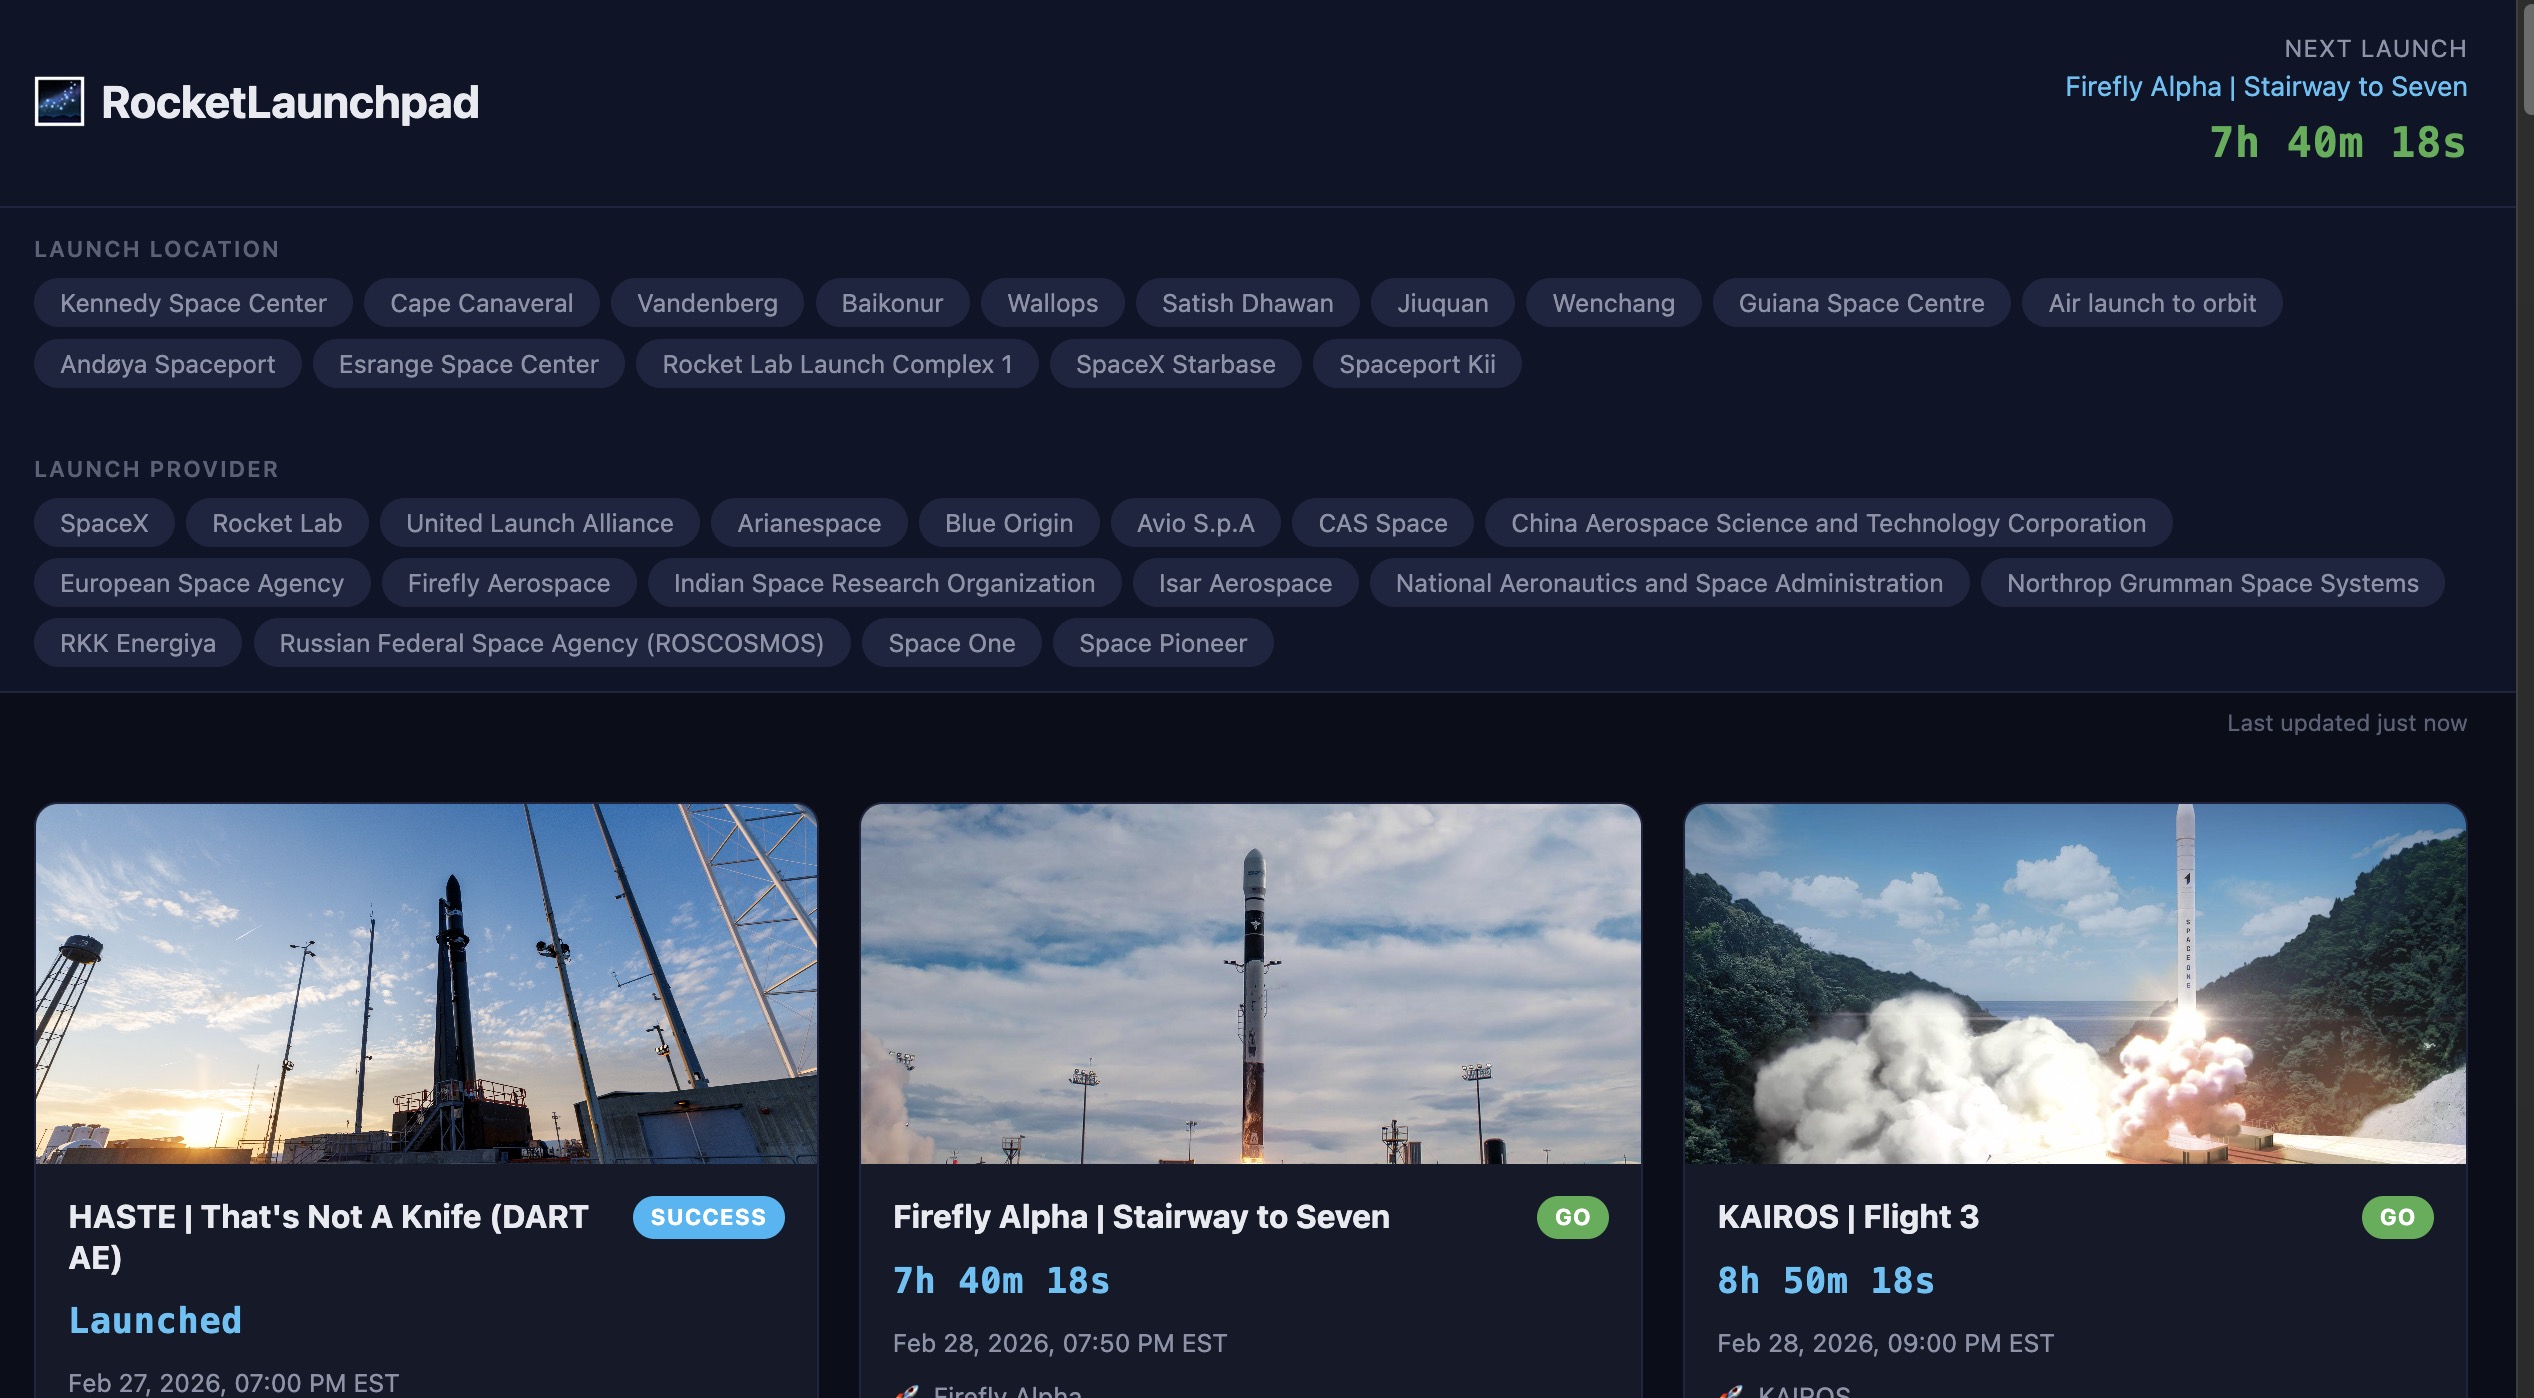
1Implementation complete. Here's the summary:
2
3  ---
4  REQ-1: Rocket Launch Dashboard — All 6 tasks completed, 16/16 acceptance criteria verified.
5
6  What was built:
7  - index.html — Single-page app with header (next launch countdown), filter bar, and launch grid
8  - css/styles.css — Dark space theme, responsive CSS Grid (3→2→1 columns), status badge colors, loading
9  skeletons
10  - js/api.js — Fetch from Launch Library 2 API with 5-min localStorage cache, 429 rate limit handling,
11  stale-cache fallback
12  - js/components.js — Launch card rendering with images, status badges, countdown elements, error/staleness
13  banners, empty state
14  - js/countdown.js — Single global 1-second interval updating all countdown timers
15  - js/filters.js — Location and provider filters with OR-within/AND-across logic, toggleable chips, dismissible
16  active filters, Clear All
17  - js/constants.js — API config, known locations/providers, status color mapping
18
19  To run it:
20  python3 -m http.server 8000
21  # Open http://localhost:8000
22
23  No dependencies — pure vanilla HTML/CSS/JS with ES modules. No npm, no build step.
24
25  Branch: dougsillars/REQ-1-build-a-web-application-to-display-upcom (pushed)
The code is ready to go. The app is a simple HTML page with no framework.
#Should I Use the BrainGrid MCP Instead?
BrainGrid also offers an MCP (Model Context Protocol) server - a way to keep BrainGrid always connected inside Claude Code. It's powerful, but there's a tradeoff.
When using the MCP, Claude spends extra tokens talking with BrainGrid at every step - even when you're just asking it to fix a typo. The slash commands from the CLI are different: they sit outside the conversation until you call them, then inject exactly the right context at the right moment.
Faster AND cheaper? For getting started, CLI and the slash commands are the way to go. You can always add the MCP later for more advanced workflows.
#What's Next
That's a working app built without writing a single line of code. The BrainGrid CLI loop is simple: specify, build, ship, repeat.
Your next step: run /specify with a feature from your own product. Swap the Rocket Launch Dashboard for whatever your users actually need - a booking page, a dashboard, a signup flow. BrainGrid turns your domain expertise into the structured specs that make AI build correctly the first time.
Ready to try it? Start your first project now.
#Frequently Asked Questions
#What is spec-driven development?
Spec-driven development is a methodology where you write detailed specifications before generating code with AI. Instead of giving AI vague prompts and debugging the output, you invest a few minutes defining what "done" looks like — acceptance criteria, edge cases, success metrics. The AI then builds against those specs, producing code that matches your intent the first time.
#Do I need to know how to code to use BrainGrid CLI?
No. BrainGrid CLI is designed for domain experts who understand their product deeply but don't have engineering backgrounds. You need Node.js installed and basic comfort with the terminal (copy-pasting commands), but BrainGrid handles the translation from your expertise into structured specs that AI coding tools understand.
#How many tokens does the MCP approach use compared to CLI?
MCP servers load tool definitions into Claude Code's context window on every prompt, consuming tokens before your conversation even starts. The CLI approach uses zero tokens at rest — it only injects context when you call a slash command. For cost-conscious builders, CLI is the recommended starting point.
#Can I use BrainGrid CLI with Cursor or Windsurf?
Yes. The BrainGrid CLI commands (braingrid specify, braingrid requirement build, etc.) work in any terminal. The slash commands (/specify, /build) are specific to Claude Code integration. For Cursor and Windsurf, BrainGrid offers rules and slash command integrations through braingrid setup cursor.
#What happens if my requirement readiness score is low?
BrainGrid rates each requirement from 1 to 5 based on completeness. A low score means the AI identified missing decisions — like a cancellation policy or error handling strategy. Add one or two clarifying sentences addressing the flagged gaps, and the score typically jumps to 4 or 5. Don't build on requirements below a 4; the missing details will become bugs.
About the Author
Doug has been helping developers build across mobile, DevOps, and AI for the last 20+ years. An O'Reilly author, international speaker, and a prolific blogger, he relishes in simplifying the complex.
Want to discuss AI coding workflows or share your experiences? Find me on X or connect on LinkedIn.
Keep Reading


Ready to build without the back-and-forth?
Turn messy thoughts into engineering-grade prompts that coding agents can nail the first time.
Re-love coding with AI