Cursor MCP Servers: Setup Guide + Best Servers List (2026)
Configure MCP servers in Cursor IDE step by step. Includes top servers (Supabase, GitHub, Figma, BrainGrid) and fixes for common .cursor/mcp.json issues.

"If you give a man a hammer, everything looks like a nail."
Cursor is an IDE with built-in AI tooling. The tooling is extremely powerful, and it can get the job done. But one AI tool alone eventually runs into limitations. You find yourself fixing boilerplate code to match reality, or copying and pasting values into your code.
Just as you wouldn't renovate a kitchen with just a hammer, relying only on Cursor will limit your ability to develop code quickly. Luckily, adding new tools to your Cursor toolbelt is easy: MCP turns Cursor from a single tool into a fully equipped workshop.
Without MCP, Cursor works with the text and the code that are provided in your repo. It has no visibility outside of that code, meaning that Cursor has a strictly one-sided view of how the code interacts with APIs, database, or any other external tool. With MCP servers, Cursor can query your database, read your Figma designs, and help you build requirements and tasks using real external content.
#What is a Cursor MCP Server?
MCP is a Model Context Protocol. Cursor uses a large language model to write and reason about code. MCP is the protocol that adds additional context to the model - helping it better understand contexts that live outside the codebase. MCP servers allow Cursor to retrieve live information from external services instead of relying on assumptions.
MCP servers act as bridges between Cursor and external services. When writing code, Cursor can use this bridge to ensure that the code properly interacts with database tables, or parses the correct output from an API response - instead of adding placeholders that must be updated manually.
#MCP Advantages
Connecting MCP server gives Cursor visibility beyond the code in your repository. Without this visibility, the model might invent placeholders that don't match your APIs, or define database schemas differently from what already exists. When the model works from actual system data, you spend less time correcting assumptions and replacing boilerplate. Instead, the connections just work.
Leveraging MCP servers in Cursor provides superpowers to Cursor. With vision and context beyond the codebase, the code generated by Cursor is more likely to be immediately useful - improving developer productivity and quality.
Now that you understand why MCP matters, let's look at which servers are worth installing.
#Top MCP Servers for Cursor
NOTE: MCP servers are not a HTTP service running on a port that is accessed by the LLM (a server). In the parlance of MCP, a server just means "the thing that provides the tool." It may be a hosted API, a local process, or a CLI-backed integration.
- Databases
- Supabase MCP Server - Query your Supabase Postgres directly, explore schemas, write queries.
- PostgreSQL/MySQL MCP Servers - Like Supabase - direct connectivity to databases.
- Issue management
- GitHub - Read PRs, check issues.
- Linear - Pull issues, update status, connect code to tasks
- Design and Communication
- Figma MCP Server - pull component specs, layouts and designs from the source.
- Slack MCP server - query conversations about issues, and designs for added context.
- Documentation
- Context7 - reads in documentation - giving the model more details about external tooling.
- Spec-Driven Development
- BrainGrid - Create requirements, and turn requirements into structured tasks
Ready to connect your first MCP server? Let's walk through the setup process.
#Cursor MCP Setup Guide
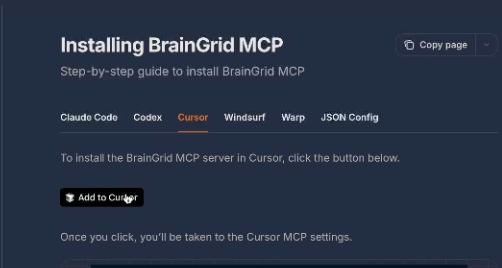
Cursor provides a directory of available MCP servers, each with a link to directly install into your local instance of Cursor. For the BrainGrid MCP, you can install from the Braingrid Documentation
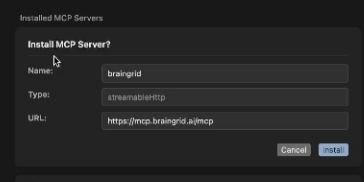
On clicking the "Add to Cursor" button, the MCP server is installed into Cursor:
Each MCP then needs to be authenticated, and given permission for the service.
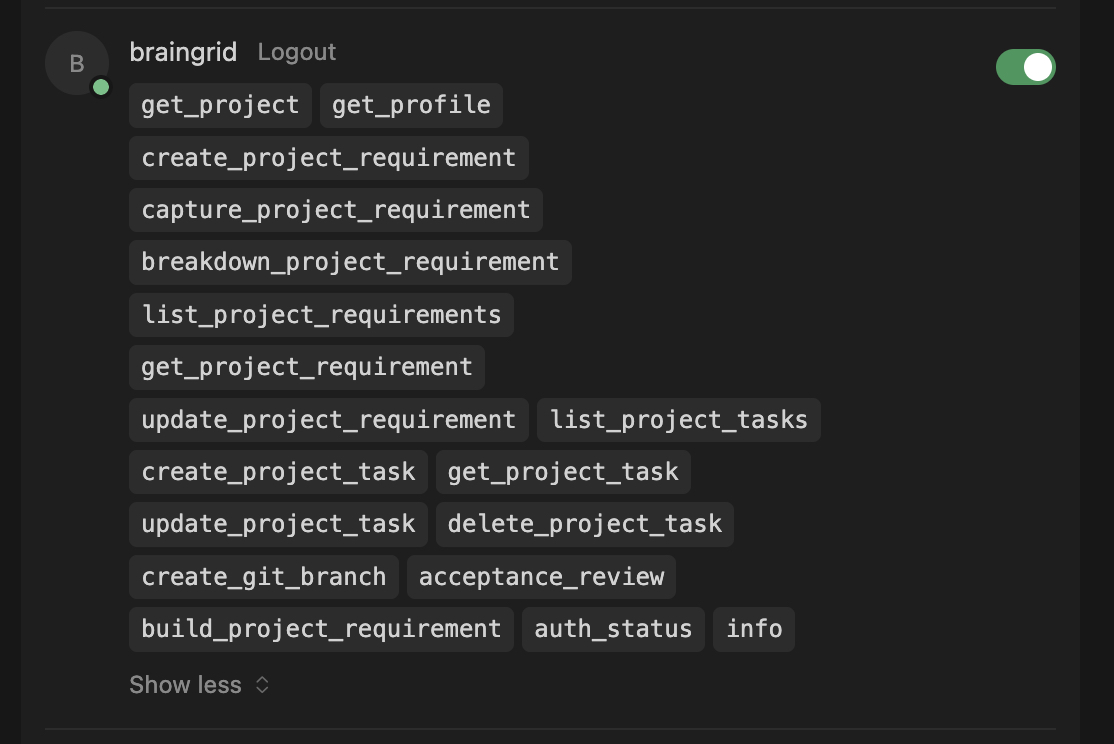
Once installed, you can see all of the permissions that Cursor has with Braingrid:
BrainGrid works better when you have the CLI and MCP installed. In your terminal:
1npm install -g @braingrid/cli
2braingrid login
Follow the login steps in your browser, then run:
1braingrid init
2braingrid setup cursor
This connects BrainGrid to your project, and enables the Cursor integration.
#JSON installation
Cursor saves MCP configurations inside your repo in the .cursor/mcp.json file. You can add your own MCP connection by adding the required JSON. The below code connects to a local MCP server with an API key. Complete instructions on connecting via JSON (and instructions on how to make your own "Add to Cursor" button) can be found in the Cursor Docs
1{
2  "mcpServers": {
3    "server-name": {
4      "url": "http://localhost:3000/mcp",
5      "headers": {
6        "API_KEY": "value"
7      }
8    }
9  }
10}
With MCP servers connected, let's see how this works in practice with a real example.
#BrainGrid MCP and Cursor: Spec Driven Development
Here's where MCP becomes a game-changer for shipping faster. Instead of writing long prompts explaining what you want to build, BrainGrid turns vague feature ideas into structured specs and implementation tasks. When Cursor connects to BrainGrid via MCP, it can read those specs directly and build the feature—no copy-pasting requirements into prompts.
Let's walk through a real example. We'll use the BrainGrid dashboard to create a requirement, then let Cursor execute the implementation tasks.

We will extend our Next.js ToDo App to add Supabase database storage for each todo.

BrainGrid, as a project management tool, helps you clarify the requirements. For example, it asked what additional data points should be added to the ToDo app. The suggestions were good, so I asked for them to be added to the requirements.
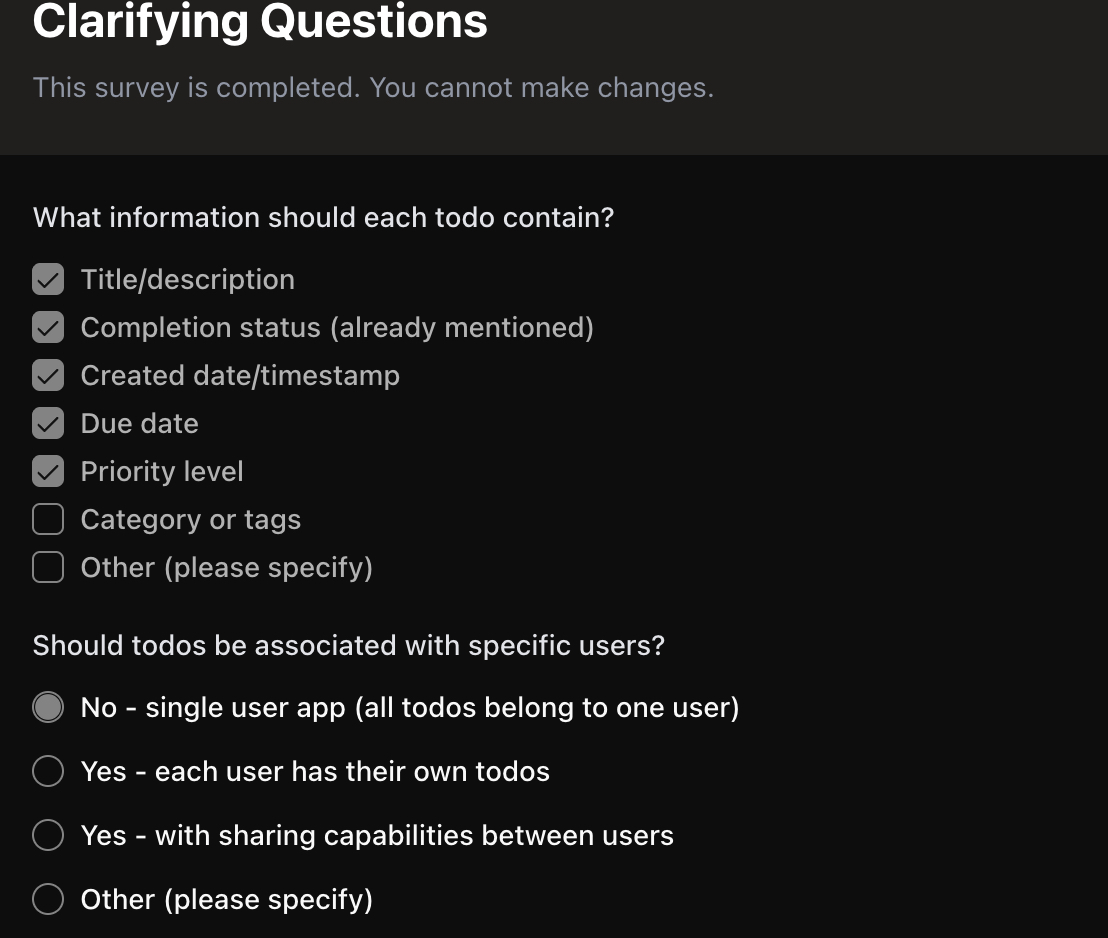
After several minutes, BrainGrid comes up with a requirement.
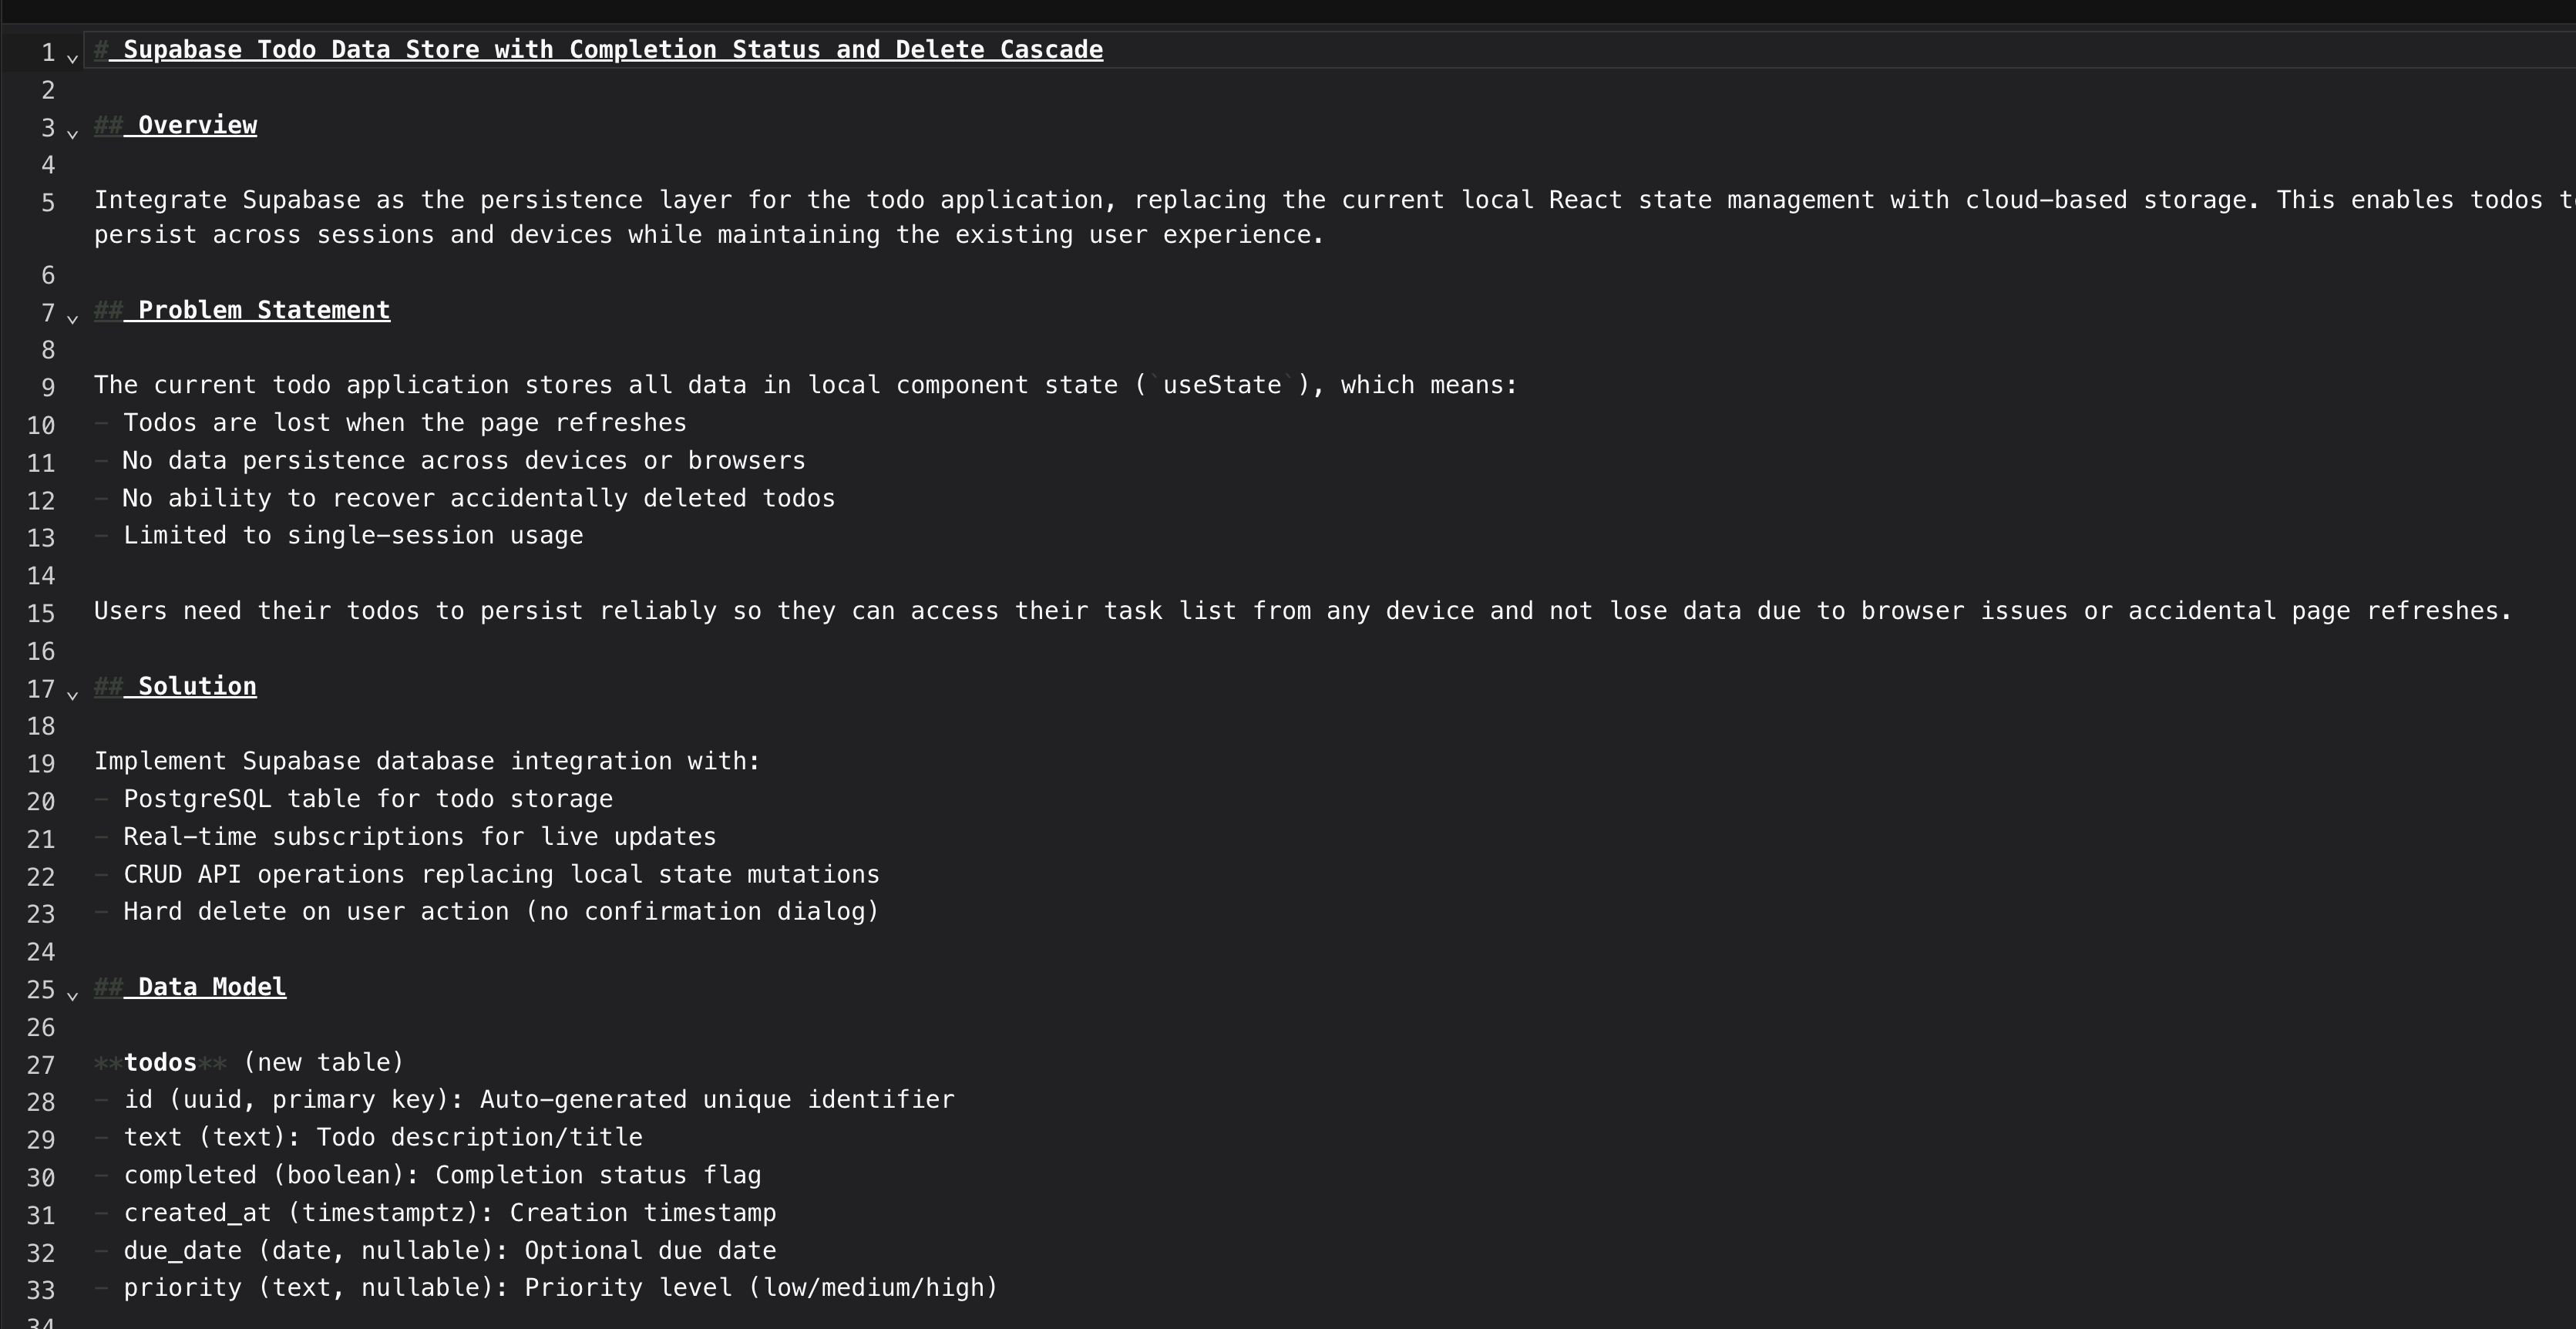
This document describes the problem, and what must be completed to create a solution. It goes on to have acceptance criteria, describing the work that must be completed to consider the specification completed. Once this is accepted, we ask BrainGrid to create the tasks and prompts that are needed to do the work. After a few more minutes we have these tasks.
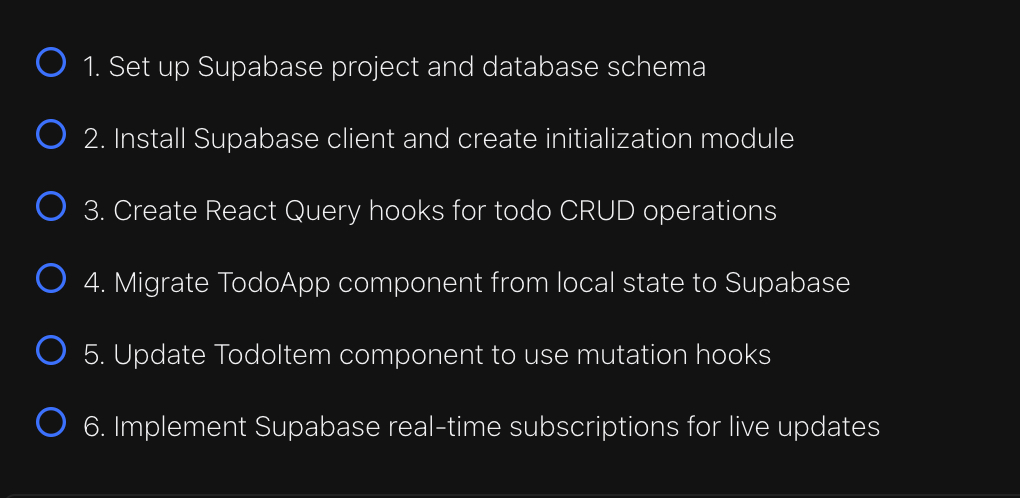
With these tasks completed, we can switch to Cursor, and just ask it to complete the tasks that BrainGrid has created. The tasks were a part of Proj-3, Req-6, so by typing
1/build proj-3 req-6
Cursor can access BrainGrid through the MCP, read the prompts and implement the code.
#Start Shipping Faster Today
Cursor is already powerful. MCP makes it dangerous (in a good way).
Without MCP, Cursor guesses at your database schema, invents API responses, and forces you to fix boilerplate. With MCP, Cursor queries your real systems and writes code that actually works the first time.
Your next steps:
- Install one MCP server for a service you already use—Supabase, GitHub, or Figma are great starting points
- Try BrainGrid to turn your next feature idea into AI-ready tasks that Cursor can build reliably via
/build - Browse the full directory at Cursor's MCP list to find more integrations
Stop copying and pasting. Let MCP connect your tools so you can focus on shipping.
#Frequently Asked Questions about Cursor MCP Servers
What is MCP in Cursor?
MCP provides Cursor with more context, by connecting external tools that the codebase may reference, or tools that reference the code (issues, designs, requirements).
How do I add custom MCP servers to Cursor?
Many services have implemented a "Add to Cursor" button that takes care of all your configurations. Manual addition of MCP servers is done via the Cursor settings panel or via a JSON file in the .cursor directory.
What is the MCP configuration format?
The JSON format includes the name, connectivity and routes required to connect to the MCP server. Details can be found in the Cursor Docs A GitHub MCP configuration might look like:
1    "github": {
2      "type": "http",
3      "url": "https://mcp.github.com",
4      "headers": {
5        "Authorization": "Bearer ${GITHUB_TOKEN}"
6      }
7    },
Does MCP use HTTP or stdio?
Cursor MCP uses both. Stdio is recommended for local tools, while http is recommended for remote connectivity.
How do I authenticate MCP servers in Cursor?
Most hosted MCP servers use OAuth, where the user logs in with a browser. For local, or API based MCPs, API keys or tokens can be used.
Where is the Cursor MCP config file?
The config file is saved in the .cursor directory of your repository.
Does Cursor support MCP prompts?
Yes. MCP servers can provide both tools (actions) and resources (data). Cursor supports the full MCP specification including prompts.
What transport protocols does MCP support?
MCP supports two transports: HTTP (recommended for remote servers) and stdio (for local tools). HTTP is the modern standard.
What are common MCP issues? How do I troubleshoot?
The trickiest part of using MCP servers is getting the initial connectivity working, and is most likely to occur when creating a JSON connection to Cursor. Once auth, tokens, and environmental values are correctly set, Cursor works seamlessly with the MCP servers.
About the Author
Doug has been helping developers build across mobile, DevOps, and AI for the last 20+ years. An O'Reilly author, international speaker, and a prolific blogger, he relishes in simplifying the complex.
Want to discuss AI coding workflows or share your experiences? Find me on X or connect on LinkedIn.
Keep Reading


Ready to build without the back-and-forth?
Turn messy thoughts into engineering-grade prompts that coding agents can nail the first time.
Re-love coding with AI