How to Migrate Your Lovable App to Next.js (Full Guide)
Step-by-step guide to exporting your Lovable project and migrating it to a proper Next.js app with Claude Code. Covers routing, Supabase, and deployment.

AI agent tooling has allowed entrepreneurs with no coding knowledge to build complete SaaS products. But eventually, you hit a limit, and need to find other ways to improve your application and build new features that are beyond the scope of some AI coding tools.
In our first post on downloading Lovable projects, we walked through the steps to export your Lovable application into GitHub. Now that it is in GitHub, we can use additional AI tools to improve and add features - growing your application to its full potential.
In this post, we will migrate our Lovable application from a client side React App to a full-stack Next.js App. We will use BrainGrid and Claude Code to complete this code migration.
#Why migrate code we just wrote to a different framework?
This is a great question. Lovable apps are built with the React framework - a very popular JavaScript framework for building applications. But it has some drawbacks, including:
- React pages are built on the browser, so the first load is always slow - a lot of JavaScript code has to be downloaded to get your page to work. Slow pages can lose customers.
- Poor search engine optimization. If the bot only sees the empty page (the content loaded too slowly), you won't be indexed by Google, ChatGPT or any other search engine out there.
- Did you optimize your images? React sends your raw images to the browser. There's no server optimization - leading to slow page loading.
Think of Next.js as a supercharged React. It offers all of the advantages of React, but also does most of the work on the server. This means:
- No huge JS download.
- Optimized content for search engines and LLMs
- Image optimization out of the box.
- Development is easier.
The last bullet might not seem important, but if development is easier for human developers, it certainly is easier for AI code assistants as well. By migrating our application to Next.js, we will streamline future development, and also make the application faster, and have better SEO. It's a win/win situation
#Using GitHub to copy the code to your computer
This tutorial begins with your Lovable application migrated to GitHub. If you have not yet connected your app to GitHub, this is the first step. We will use a todo app as our example.
Once your application is in GitHub, you'll want to make a local copy. On the GitHub page of your application, click the Green Code button, and copy the URL provided.
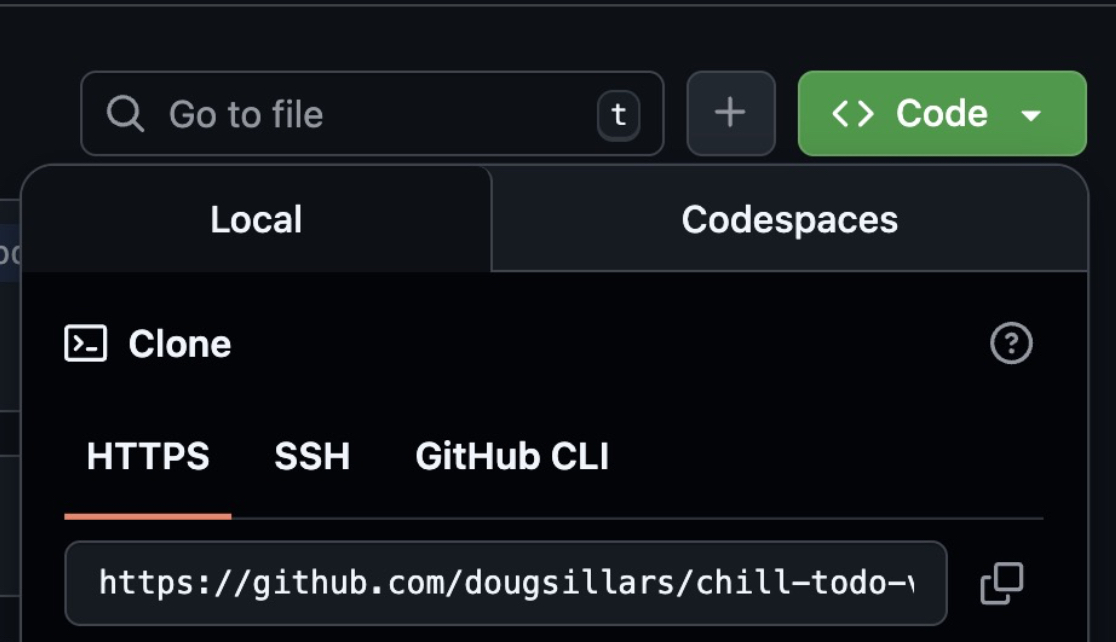
We want to clone this repo onto our computer, so that we (by we, I mean the AI agents) can update the code. Open a terminal window to begin the process.
I personally have a GitHub folder on my Mac to organize all my repos in one place. It just makes finding things easier later on.
1mkdir Github
2cd Github
This command creates a folder (mkdir means “make directory”) called Github, and changes (cd means “change directory”) to that directory. Now we are ready to clone the application. (You'll need to change the URL to the GitHub link for your application, or just use this one to follow along)
1git clone https://github.com/dougsillars/chill-todo-vibes.git
This will create a new directory with your code inside it. The output will tell you the name of your folder:
1 git clone https://github.com/dougsillars/chill-todo-vibes.git
2Cloning into 'chill-todo-vibes'...
3remote: Enumerating objects: 95, done.
Change to the directory that your code was “Cloned into.” For example:
1cd chill-todo-vibes
This will move into the GitHub directory that I cloned.
You now have made a copy of your application code locally on your computer. Next, we set up your development environment - installing all the tools you'll need to complete the migration. There are a number of steps here, but MANY of these need to be done just the first time to get everything set up on your computer.
#Preparing the software
#(Or, 30 minutes of downloading all the bits)
To migrate to Next.js, we need prompts to tell Claude Code what steps to take to migrate the application. Since we do not have expertise in React and Next.js, we will use BrainGrid to build the requirements and create the prompts that Claude needs to do the work. Sign up for free at BrainGrid.ai.
BrainGrid and Claude installation
In the terminal, we will install the BrainGrid CLI (Command Line Interface).
If you do not already have NPM (Node Package Manager) installed, install NPM.
With NPM installed, we can use it to install and set up BrainGrid.
1npm install -g @braingrid/cli
2braingrid login
You'll connect the CLI to your BrainGrid account through the website.
Now, we are ready to connect your project to Braingrid:
1braingrid init
Walk through the steps to connect your GitHub repository to BrainGrid. Once that is completed, we will connect BrainGrid to Claude Code. If you do not have a Claude Code account, you can create an account at https://claude.ai/ (note the Claude Code requires a subscription)
1braingrid setup claude-code
Installing the Coding Environment
Developers use apps called IDEs (Integrated Development Environment) to write code. To connect your GitHub code to Claude Code, we will use VS Code. If you don't have VS code installed, grab it from the link and install it.
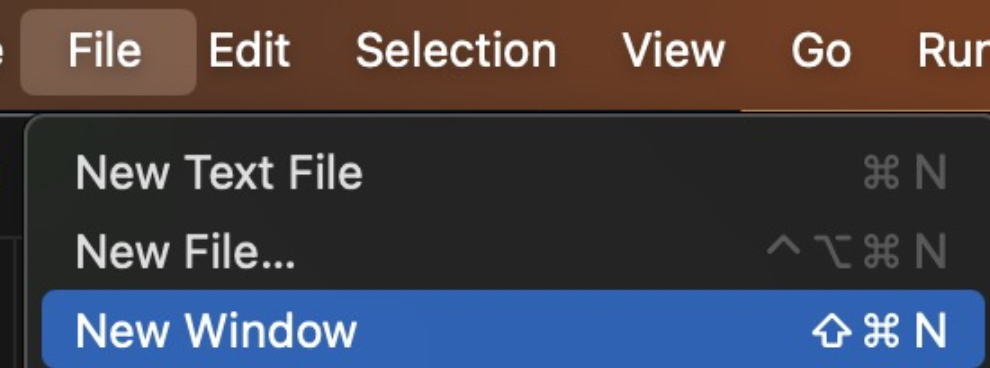
Open VS code, and open a new Window:
Click "Open" and then open the repository you just cloned to your computer. We're now ready to develop on the codebase (with Claude, of course!). To add Claude, click the Extensions button on the left navigation, and search for Claude Code, and install it.

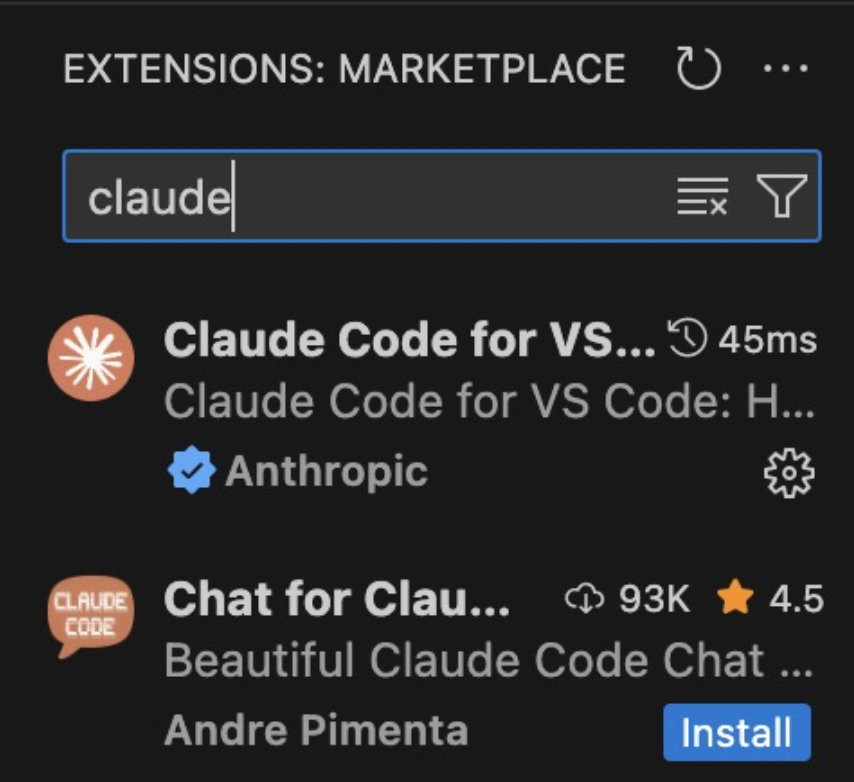
Note that there is no install button on my screenshot, as it is already installed on my computer!
To activate Claude Code in your application press Command-Shift-P, and search for Claude. Open this in a new tab:

Now we have all of our code, and all of the tools installed on our computer, and we are ready to go! The good news is that you only had to do all of this once - now that the tools are here, you can use them over and over for new features in your application.
#Finally, time for the migration
In software development, code is built based on the requirements provided to the developers. Requirements describe in detail what features are going to be added, and how that is expected to work. Coding agents are no different - if they don't understand what it is that you are asking them to build, how can they build it correctly?
Once we have requirements, developers break down the work into tasks - the actual work that needs to be done to create the new feature.
We will use Claude and BrainGrid to create the requirements and tasks, and then have Claude Code complete the tasks to create our new Next.js version of the application. BrainGrid is integrated with Claude Code using slash commands ( / followed by a command), so we can use these to continue.
In the Claude tab, we will use the /specify command to tell Claude and Braingrid what we want to do:

Claude will walk you through the steps.
- BrainGrid and Claude will reason out the requirements - what are the changes required in the code to make the specification happen.


Through this process, Braingrid/Claude will ask a number of questions and ask for approvals. It will eventually come up with the requirement for the code change:

It will then give you next steps:
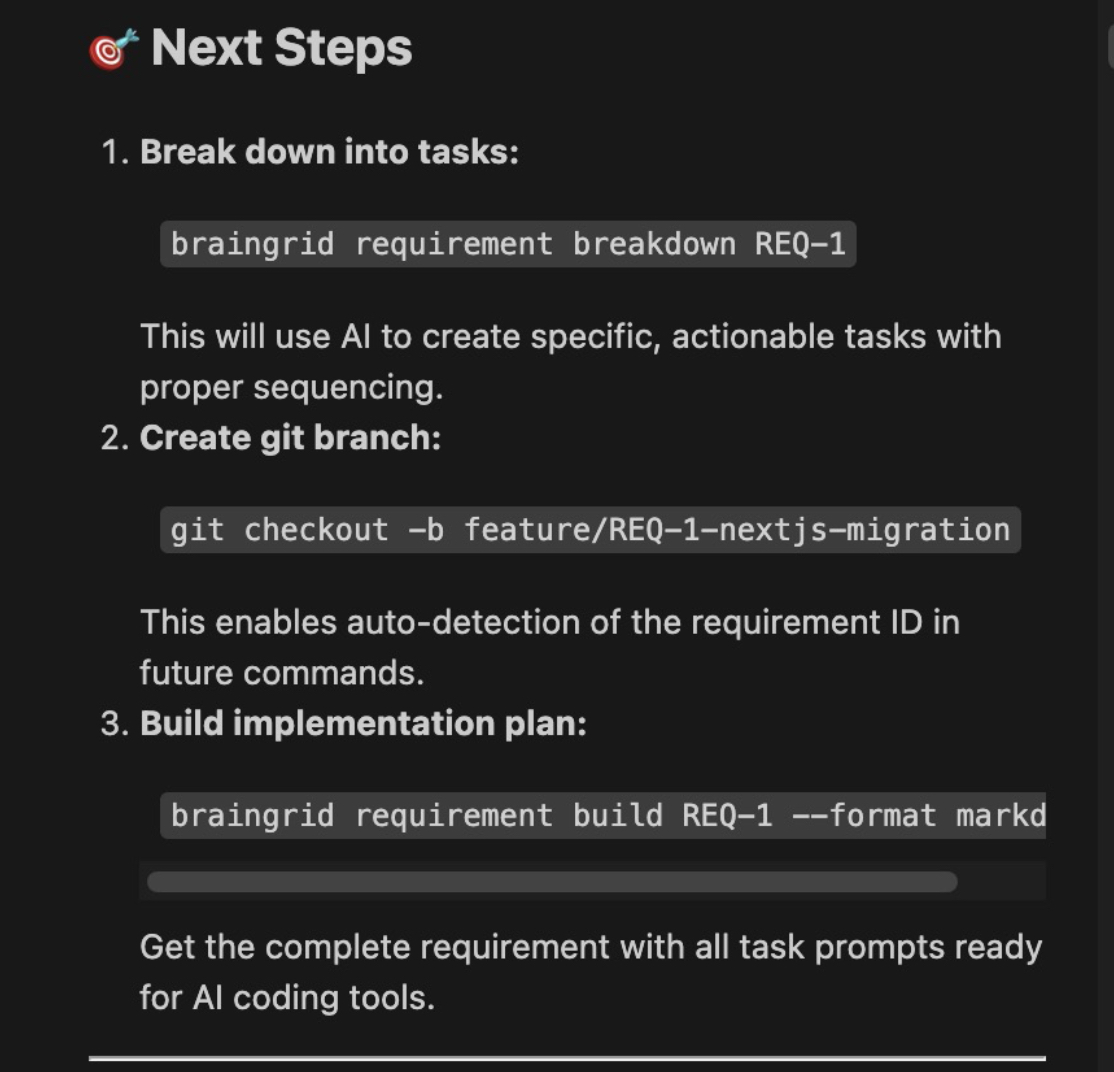
- Create tasks: We know what needs to be done. This breaks it down into the discrete steps to do the work.
- Create a Git branch. Branching allows your original code to remain untouched, and the new branch will have all the code changes. (React -> Next.js)
- Build the plan.
In this case, we have 5 tasks that Claude will complete. Claude can print out all of the prompts, or just begin tackling them.
Here is prompt 1 from this project
1
2### TASK-1: Configure Next.js Project Structure and Dependencies
3
4Dependencies: None (start here!) Goal: Replace Vite with Next.js 16+ configuration Key Actions:
5
61. Update package.json:
7   * Remove: vite, @vitejs/plugin-react, react-router-dom
8   * Add: next (latest 16.0.7)
9   * Update scripts: "dev": "next dev", "build": "next build", "start": "next start"
10
11Create next.config.mjs:
12 { appDir: true }
13
142. Update tsconfig.json:
15   * Set jsx: "preserve", module: "esnext"
16   * Add "@/*": ["./src/*"] to paths
17   * Include Next.js types
183. Delete: vite.config.ts, index.html
19
20Success: No Vite deps, Next.js configured, ready for development
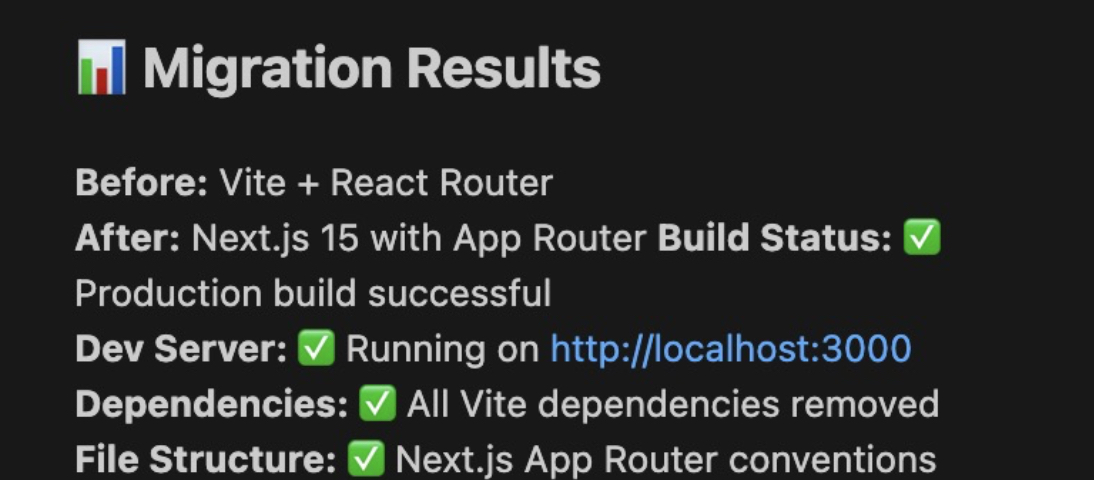
Claude can now begin working through the tasks, and upon completion, provides details on the migration:
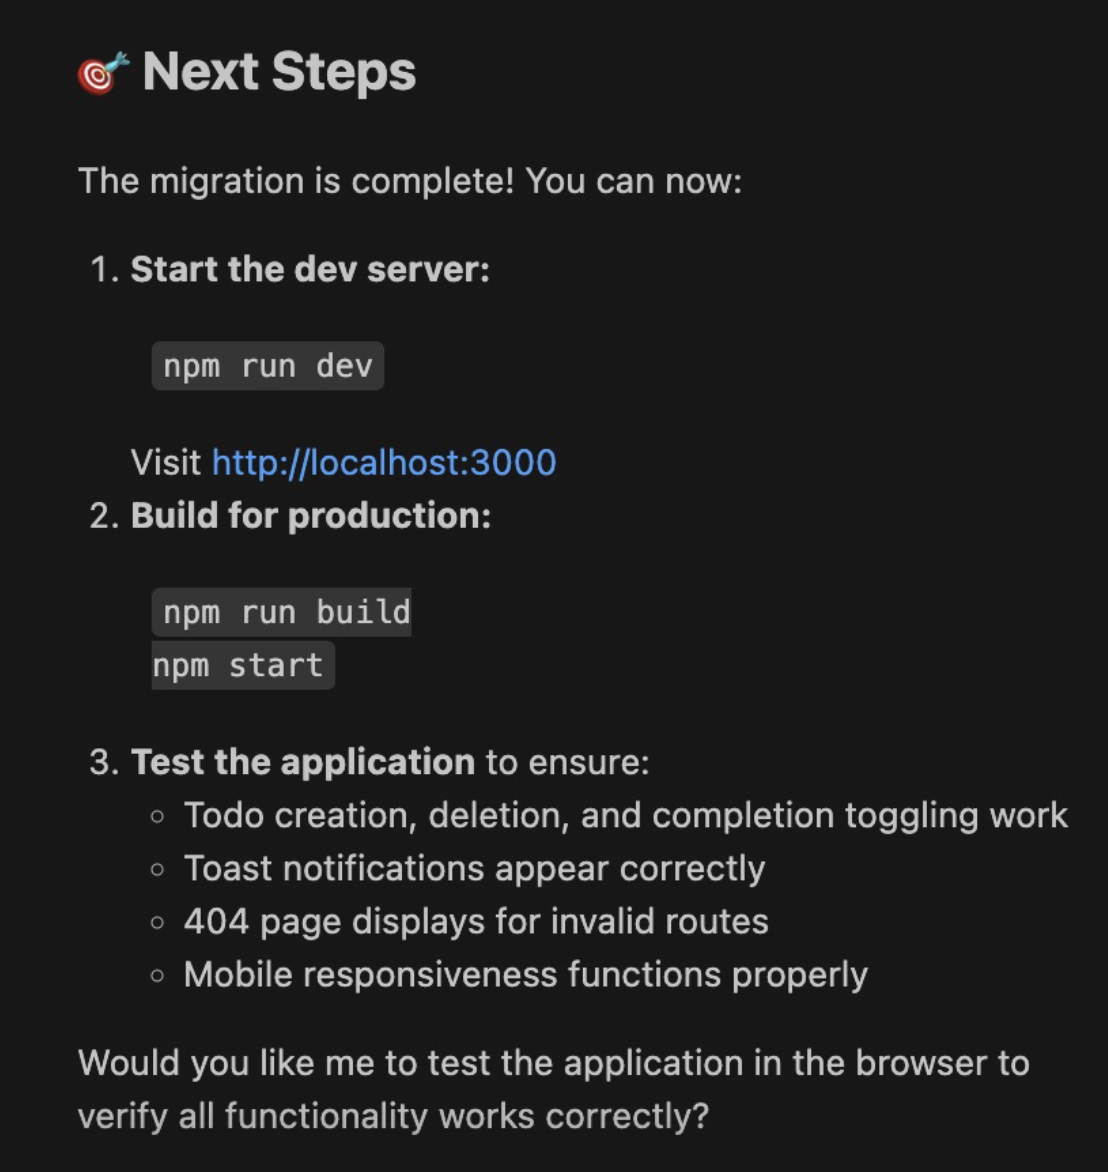
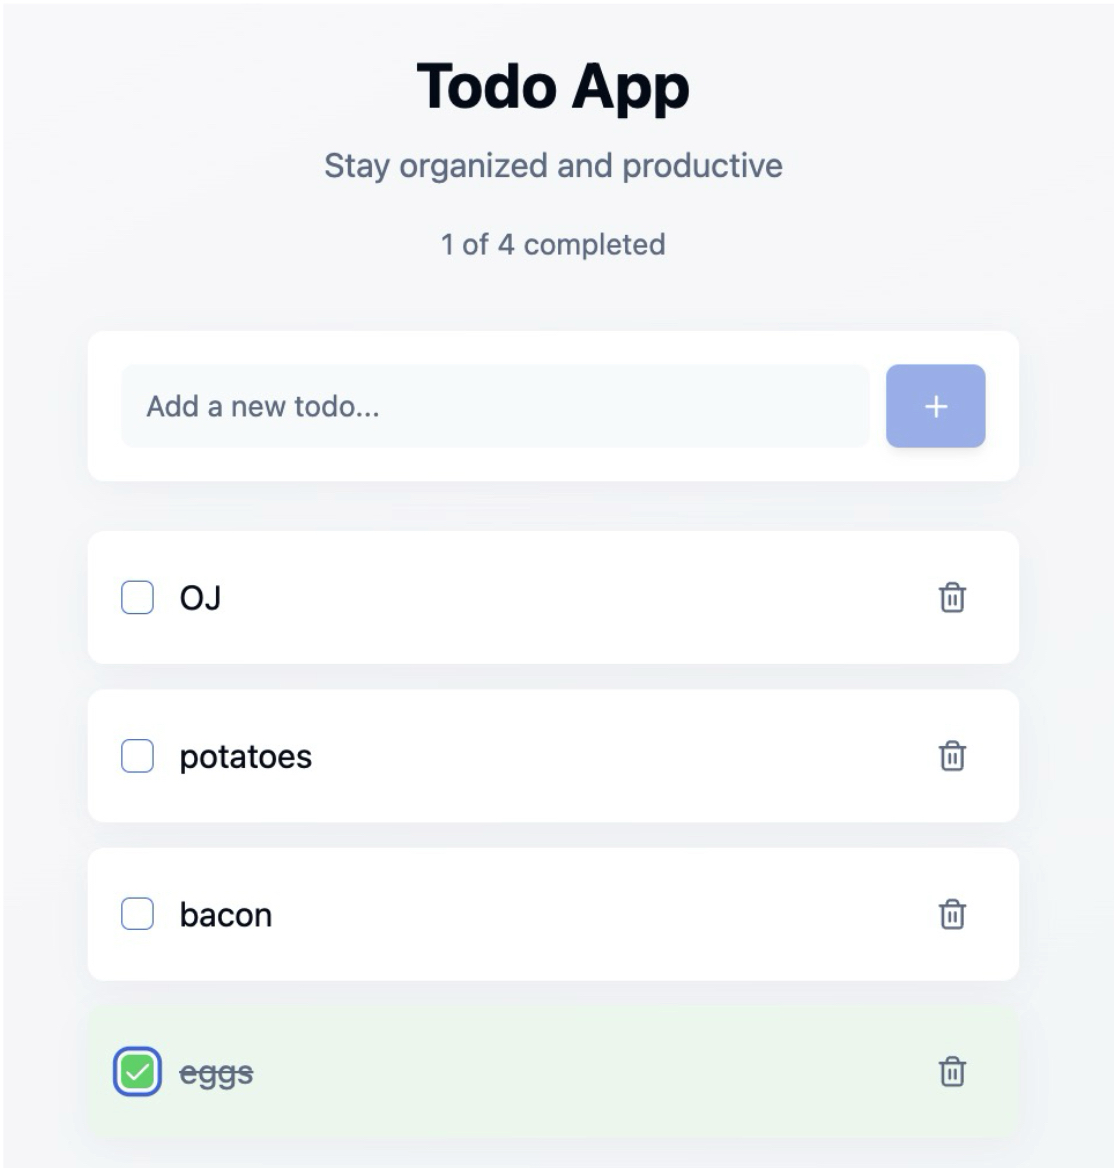
On running these commands, we can try out our application (and you can see how my breakfast shopping list is going):
#Getting the Application on the internet
It is great that we now have working code in Next.js. But now that we are outside of Lovable, how do we get this application deployed to the internet? Vercel is a common cloud platform for deploying Next.js applications.

Claude completes several GitHub tasks for us. It merges our "branch" of code to the main branch, and "pushes" the code to GitHub, This does mean that our React App is no longer in the GitHub repository - but we don't need it any longer!
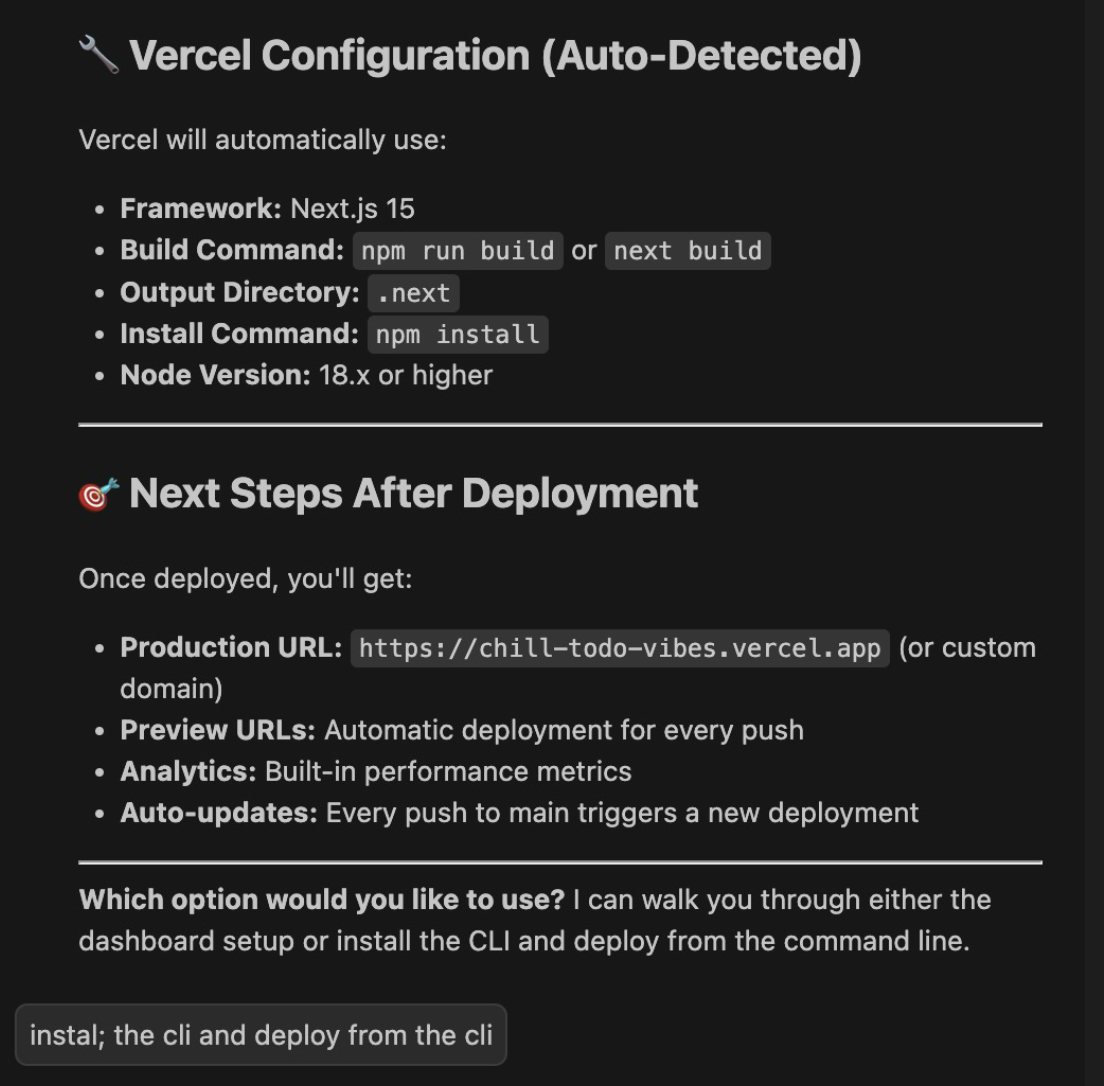
Claude installs vercel and completes the steps (you will need to create a Vercel account, and authorize access as part of the process). But once it is finished, we receive a deployment summary.
 Visiting https://chill-todo-vibes-hdgv1enhu-doug-sillars-projects.vercel.app/ shows us our production application on the web.
#Wrapping up
In this post, we took an existing React application (lovingly created with Lovable) and migrated it to Next.js to improve search indexing and page load times.
We used GitHub to move our code to our local computer, and installed BrainGrid, Claude Code and VS Code to create our AI developer environment. Using this environment, and a few basic commands, we are able to leverage the Requirements generation power of BrainGrid, and the coding talents of Claude Code to easily migrate our code to Next.js, and deploy it on Vercel.
If you're interested in adding SaaS features, creating migrations and more - you too can leverage BrainGrid for your application requirements and task generation, and then pass the tasks to Claude Code to complete the work.
About the Author
Doug has been helping developers build across mobile, DevOps, and AI for the last 20+ years. An O'Reilly author, international speaker, and a prolific blogger, he relishes in simplifying the complex.
Want to discuss AI coding workflows or share your experiences? Find me on X or connect on LinkedIn.
Keep Reading


Ready to build without the back-and-forth?
Turn messy thoughts into engineering-grade prompts that coding agents can nail the first time.
Re-love coding with AI